Southwest Florida lawns have a different starting point than many homeowners expect. In neighborhoods around Fort Myers, Cape Coral, Naples, Bonita Springs, Lehigh Acres, Estero, and surrounding communities, the soil under a lawn is often sandy, fast-draining, and heavily affected by construction activity, irrigation patterns, summer storms, and salt air near the coast.
That does not mean a new lawn cannot look great. It means the preparation before sod delivery matters.
Fresh sod is a living product. The faster the roots make firm contact with clean, properly graded soil, the better the lawn can begin establishing. If the ground is uneven, compacted, full of old weeds, or bone-dry under the surface, the sod has to fight from day one. A little planning before installation can prevent many of the brown edges, low spots, washouts, and patchy areas homeowners see after a rushed job.
Below is a practical checklist for preparing sandy Florida soil before sod installation.
Why Sandy Soil Changes the Sod Prep Process
Sandy soil drains quickly, which can be helpful during rainy season, but it also means water and nutrients can move through the root zone faster than expected. In practical terms, new sod may dry out sooner on a sandy lot than it would on heavier soil, especially on sunny corners, along driveways, and near reflected heat from pavers or stucco walls.
UF/IFAS guidance for Florida lawn establishment emphasizes clean grading, debris removal, good soil contact, and careful irrigation after planting. Those points are especially important in Southwest Florida because many residential lots include builder fill, old shell or rock fragments, construction debris, and compacted paths from equipment traffic.
The goal is simple: create a smooth, firm, lightly moist surface where the sod roots touch soil immediately.
Step 1: Remove Old Grass, Weeds, Roots, and Debris
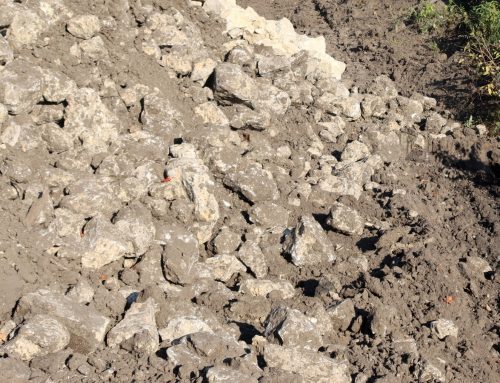
New sod should not be laid over a messy surface. Old turf, weeds, dead roots, palm fronds, rocks, concrete pieces, and construction scraps can all interfere with root contact. Even small debris can create air gaps under sod pieces, and those areas are more likely to dry out or turn brown.
Before installation, walk the entire lawn area and look for:
- Old grass mats or dead turf
- Weed patches and vines
- Exposed roots
- Rocks, shell, gravel, or concrete pieces
- Irrigation flags, caps, or broken sprinkler parts
- Low spots holding water after rain
- High spots that will scalp under a mower
For full lawn replacement, removing the existing grass is usually cleaner than trying to bury it. If weeds are active, they should be addressed before the sod arrives so the new lawn is not competing with established roots underneath.
Step 2: Rough Grade the Yard Before Fine Leveling
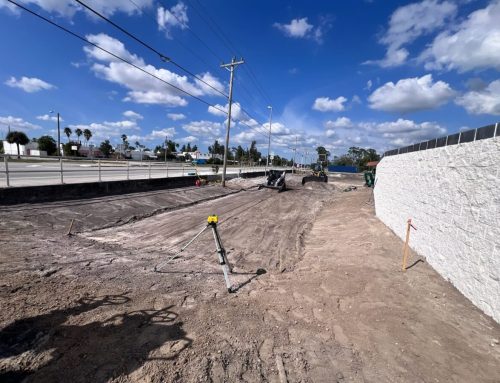
Grading is one of the most overlooked parts of sod installation. Homeowners often focus on the grass type but forget that water follows the shape of the soil. A beautiful pallet of sod cannot fix a yard that slopes into the house, traps water by the driveway, or leaves low pockets where rain sits for days.
A good rough grade should move water away from the foundation, patios, walkways, and pool cages. It should also smooth out sharp dips and mounds so the finished lawn can be mowed evenly.
In Southwest Florida, pay special attention to:
- Swales between homes
- Driveway edges
- Lanai and pool cage borders
- Downspout discharge areas
- Seawall or canal-side slopes
- New construction lots where fill settled unevenly
The lawn does not need to be perfectly flat. In fact, perfectly flat yards can drain poorly. It should be smooth, properly pitched, and free of abrupt low areas.
Step 3: Loosen Compacted Areas Without Making the Soil Fluffy
Sandy soil can still compact, especially where trucks, skid steers, dumpsters, or foot traffic crossed the property. Compacted areas prevent roots from moving easily into the soil and can cause water to run across the top instead of soaking in.
The fix is not to make the entire yard loose like a garden bed. Sod performs best on a firm surface. But compacted sections may need light loosening, raking, or preparation so roots are not sitting on a hardpan layer.
A simple homeowner test is to push a screwdriver into the soil in several spots. If it slides in easily in one area but stops hard in another, that hard area may need extra preparation before sod goes down.
Step 4: Correct Irrigation Problems Before Sod Delivery
New sod needs consistent moisture during establishment. If sprinkler coverage is uneven, some areas will stay wet while others dry out. That creates a patchwork lawn even when the sod itself is healthy.
Before the delivery truck arrives, run the irrigation system and check every zone. Look for broken heads, clogged nozzles, blocked spray patterns, overspray onto pavement, and dry corners. If the lawn has both sunny and shaded areas, expect different drying speeds.
Common Southwest Florida trouble spots include:
- Narrow strips between the driveway and property line
- Corners near sidewalks or pavers
- Areas under roof overhangs
- Wind-exposed canal or corner lots
- Spots shaded by palms, fences, or pool cages
It is much easier to repair irrigation before sod is installed than after the new lawn is already rooting.
Step 5: Lightly Moisten the Soil Before Installation
Sod should not be placed on dusty, hot, powder-dry soil. Light moisture helps cool the surface and improves root contact. The goal is damp soil, not mud.
If the ground is too dry, the soil can pull moisture away from the sod. If it is too wet, installers may leave ruts, footprints, and uneven seams. A light watering before installation is usually enough unless the site has been dry for a long stretch.
During the hottest part of the year, this step matters even more. Sod sitting on a hot, dry surface can stress quickly, especially along edges.
Step 6: Match the Grass Type to the Property
Soil prep is only part of the decision. The right sod variety also matters. St. Augustine, Bahia, Zoysia, and specialty turf types each have different strengths. Some homeowners want a dense curb-appeal lawn for an HOA neighborhood. Others need a more practical lawn for a larger sandy lot, pets, or lower maintenance expectations.
A good sod recommendation should consider:
- Sun versus shade
- Irrigation availability
- Soil drainage
- Foot traffic
- Mowing expectations
- HOA rules
- Coastal exposure
- Budget and maintenance preference
For example, a highly visible front lawn in an HOA community may call for a different recommendation than a large side yard with limited irrigation. Sunshine Sod can help homeowners choose a practical option instead of guessing based on pictures online.
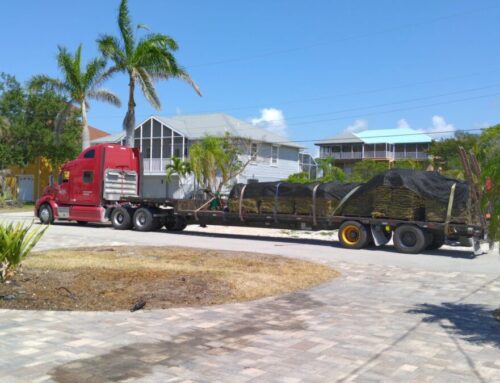
Step 7: Schedule Delivery Close to Installation Time
Fresh sod should be installed as soon as practical after delivery. Pallets left sitting in Florida heat can decline quickly. That is why coordination matters: the site should be prepared before the sod arrives, not after.
If you are planning a full lawn replacement, line up the removal, grading, irrigation check, delivery, and installation sequence so the sod spends as little time as possible stacked on the pallet. This is especially important during warm, humid weather when sod can heat up internally.
What Homeowners Should Not Do Before Sod Installation
Some mistakes create problems that are hard to fix later. Avoid these before your sod installation:
- Do not lay sod over active weeds and hope they disappear.
- Do not ignore drainage problems near the house or driveway.
- Do not leave construction debris buried under the lawn area.
- Do not assume every sprinkler zone is working without testing it.
- Do not create a fluffy, uneven seedbed that settles after installation.
- Do not wait until the sod truck arrives to start grading.
The best installs usually look boring before the grass arrives: clean soil, smooth grade, working irrigation, and a clear plan.
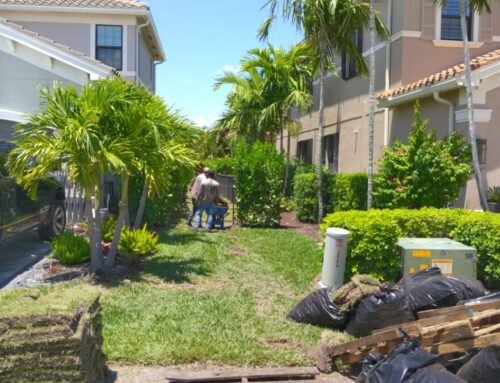
When to Call Sunshine Sod
If your yard needs new sod in Southwest Florida, Sunshine Sod can help with sod delivery, installation planning, and lawn replacement guidance. Whether you are replacing a tired lawn, finishing a new construction home, cleaning up after landscape work, or improving HOA curb appeal, the right preparation makes the finished lawn stronger from the start.
For best results, contact Sunshine Sod before the site is fully ready. A quick conversation about access, measurements, irrigation, soil conditions, and grass type can prevent delays and help the installation go more smoothly.
Bottom Line
Sandy soil is normal in Southwest Florida, but it needs to be prepared correctly before sod installation. Remove debris, grade for drainage, fix irrigation coverage, lightly moisten the soil, and choose a sod type that fits the property. When those pieces are handled before delivery, the new lawn has a much better chance to establish evenly and look clean from the curb.
Sunshine Sod can help homeowners and property managers plan sod delivery and installation with local conditions in mind.
Related Sunshine Sod Resources
For more help planning the right sod project, use these Sunshine Sod resources: